GitOps setup in Google Kubernetes Engine using Flux CD
This tutorial exemplifies how to set up Flux in Kubernetes, a tool that keeps your applications updated as Yaml files get updated in a Git repository.
I will start by answering the question that I posed myself when I first heard about the idea behind GitOps. Why?
Having automated deployments, every time new code gets merged into the master branch can reduce operations overhead. But, it’s not like the release process with state-of-the-art CI/CD tools such as Azure DevOps, or Jenkins is too much of a hassle; once set up, you have to click deploy when new changes are ready, right?
This guide will see how GitOps can help you save time and provide some peace of mind when working as Kubernetes Administrator.
I used:
- Two Kubernetes clusters, one for the “WordPress Team” and one for the “NodeJS team,” both fictional.
- A Git repo and basic knowledge of version control systems (VCS).
- Kubectl and FluxCD command-line tools.
- Optional VScode and the gcloud CLI.
At the end of this tutorial, you will have two Kubernetes Clusters, nodejs_cluster and wordpress_cluster, that update automatically with the contents of one Git repository structured like this:
.
└───apps
│   │
│   └───nodejs // K8s manifest to deploy nodejs.
│   │
│   └───wordpress // K8s manifest to deploy Wordpress.
│
└───infrastructure // K8s manifest to deploy MySQL.//A copy of the code used in this tutorial is available in this Git repository
//. https://github.com/FelipeLujan/flux_example
To complicate things further, WordPress has a dependency on MySQL. Deployments on wordpress_cluster need to happen in a particular order. nodejs_cluster does not require WordPress, but the dev team needs MySQL.
We might be able to write the Kubernetes manifests for deploying MySQL once and reuse them when configuring each team’s cluster!
Flux to the rescue!!!
Kubernetes cluster
I will be using a Standard Google Kubernetes Engine (GKE) as a personal preference. If you already have a cluster to work with, skip this section. Minikube and Kind work just fine.
In Google Cloud’s Console, search for GKE and select Kubernetes Engine.

Enable the Google Kubernetes Engine API if prompted.
Create a new standard cluster once you get to the GKE product page.

Leave the default options and click Create.
With your brand new Kubernetes cluster up and running, authenticate your command line with Kubernetes — a fancy way to say: get the kubeconfig for your cluster. In Google Cloud, you would usually do something like this.
gcloud container clusters get-credentials YOUR_CLUSTER_NAME --zone YOUR_ZONE--project PROJECT_NAMEMake sure that you can now kubectl into your cluster.
kubectl get no
NAME             STATUS   ROLES    AGE     VERSION
gke-cluster-1   Ready    <none>   3m48s   v1.21.6-gke.1503
gke-cluster-2   Ready    <none>   3m48s   v1.21.6-gke.1503
gke-cluster-3   Ready    <none>   3m48s   v1.21.6-gke.1503
Create a Git repository
I will use Google Clour Source Repositories to demonstrate the usability of Flux in private, corporate environments. Github or any publicly available Git service is valid as well.
In the Google Cloud Console, search for source repositories.
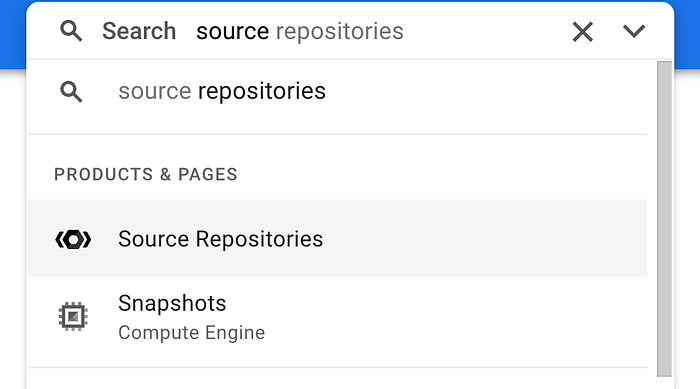
Create a new git repository with a globally unique name.
Once you have the repository you want to work with, push the code available in this public git repository. Do not deploy any file to Kubernetes just yet.
Generate SSH keys
You will want to get SSH authentication set up. Regardless if you use Google Cloud Repos, Github, BitBucket, or a different VCS.
Using SSH authentication is effectively the opposite of moving to a new place in the physical world, where they first make the key and give it to you to open the door lock. With SSH, you generate the key and then request access for that key. That is a bit of an oversimplification, but you still do not want to lose your SSH keys or transfer them to untrusty individuals…
If your computer uses Microsoft Windows, install Putty to generate SSH keys.
In Mac, you can use open ssh and run the following command to genera new SSH key pairs.
ssh-keygen -t rsa -C "user@example.com"Press enter to generate the new keys in the default folder.
Register your SSH keys with the VCS platform of your choice
This step varies heavily depending on the Git service you prefer, choose yours from below.
Google Cloud Source Repositories
Set up Flux on wordpress_cluster
Download and install Flux using the following command
brew install fluxcd/tap/fluxWith Flux installed on your local computer, it will need to know the URL of your repository, the credentials to access it, the branch, and the folder that contains the Kubernetes manifests. Providing this information for the first time is called bootstrap
Below is an example of the flux bootstrap command.
flux bootstrap git \--url=git@github.com:GIT_USERNAME/REPO.git \--private-key-file=/Users/YOUR_USERNAME/.ssh/id_rsa \--silent \--path=./clusters/wordpress_cluster \--branch="master"
--url:The URL of your Git repo, do not use the URL of the repository that I shared as you need to push commits to it, so feel free to fork it—-private-key-file: The path in your local computer to the private ssh key.--branchand--path: Are the name of the branch and path (relative to the repository root) that contains the Kubernetes manifests, Respectively
The bootstrap process will:
- Create a secret with the SSH key provided in
--private-key-file. - Push the folder
flux-systemin--pathin your git repository with some.yamlfiles. Do not edit those files. - Clone the repo inside a Kubernetes Custom Resource (CR).
- Create the
flux-systemnamespace and the flux controllers in it.
Is from that cloned repository — in the namespace flux-system— that Flux will grab the Kubernetes manifests that it will apply.
The results of the flux bootstrap command looks similar to this.
► cloning branch "master" from Git repository "ssh://
✔ cloned repository
► generating component manifests
✔ generated component manifests
✔ committed sync manifests to "master"
► pushing component manifests to "ssh:
✔ installed components
► confirming components are healthy
✔ helm-controller: deployment ready
✔ kustomize-controller: deployment ready
✔ notification-controller: deployment ready
✔ source-controller: deployment ready
✔ all components are healthy
After bootstrapping,wordpress_cluster will host the following resources:
kubectl get deploy
NAME        READY   UP-TO-DATE   AVAILABLE   AGE
mysql       1/1     1            1           118m
wordpress   1/1     1            1           3m52skubectl get svc
NAME              TYPE           CLUSTER-IP   PORT(S)        AGE
wordpress         LoadBalancer   10.8.3.23    80:30660/TCP   7m5s
wordpress-mysql   ClusterIP      None         3306/TCP       121m
Kustomizations
The files infrastructure.yamland apps.yaml, in /clusters/wordpress_clusterare particularly interesting, as they indicate Flux that it should install and look for changes on the contents of ./infrastructure and ./apps/wordpressrespectively.
This functionality is very powerful, as you can have another Kubernetes cluster, nodejs_cluster, for example, watching the folder ./clusters/nodejsand ./infrastructure at the same time, meaning that both clusters will replicate the contents of./infrastructure ; and you have only one code base to maintain.
Set up Flux on nodejs_cluster
Authenticate your command line to use the kubectl command pointing to nodejs_cluster.
Disclaimer: I will be borrowing zarakmughal’s nodejs-starter docker image for this example.
Run the bootstrap command but this time make--path point to the folder ./clusters/nodejs_cluster .
flux bootstrap git \--url=git@github.com:GIT_USERNAME/REPO.git \--private-key-file=/Users/YOUR_USERNAME/.ssh/id_rsa \--silent \--path=./clusters/wordpress_cluster \--branch="master"
After the bootstrap command executes, you should see similar to this
► confirming components are healthy
✔ helm-controller: deployment ready
✔ kustomize-controller: deployment ready
✔ notification-controller: deployment ready
✔ source-controller: deployment ready
✔ all components are healthy
Check the status of the Kustomizations created by clusters/nodejs_cluster/apps and clusters/nodejs_cluster/infrastructure.
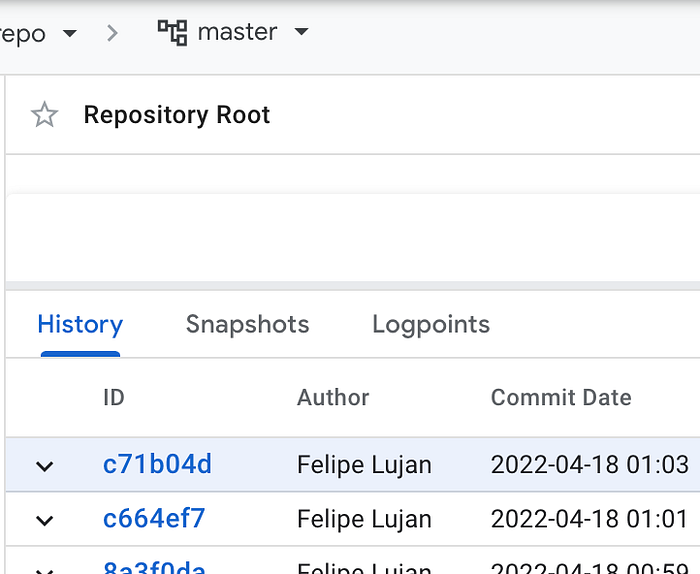
flux get kustomization -A
NAMESPACE       NAME            REVISION        SUSPENDED   READY
flux-system     apps            master/c71b04d  False       True
flux-system     flux-system     master/c71b04d  False       True
flux-system     infrastructure  master/c71b04d  False       True
Here, the Revision master/c71b04d should match the last commit in the master branch.
Clean up
To remove flux run: flux uninstall
To remove the deployments that flux created: kubectl delete deploy nodejs
To delete the service that flux created: kubectl delete svc nodejs
Today you learned
- Flux is a fantastic tool for automating deployments of multiple Kubernetes Clusters.
- Flux allows you to have a single code base that you can reuse for as many clusters as you need; just point the Kustomization files to the folder containing the Kubernetes manifests.
- Using Kustomizations, you can point Flux into different folders, each containing a different set of Kubernetes manifests that will be re-deployed when changes get pushed to VCS.
- The initial command for setting up flux is
flux bootstrapit requires the URL of a Git repo, authentication credentials, a branch name, and the folder within that repo that contains the Kubernetes Manifests that you need to deploy. - To check on the status of flux Kustomizations use
flux get kustomizations -n NAMESPACEor usekubectl get